MeshCore Raspberry Pi 1W Repeater
This document outlines the bill of materials (BOM) and setup for a MeshCore repeater using a Raspberry Pi and a MeshADV board or similar SX1262 radio. Tested with MeshADV and PiMesh-1W v1
For setup instructions for the PiMesh-1W v2, follow the guide provided on MeshSmith’s site.
📋 Bill of Materials
| Item | Qty | Price (USD) | Link | Notes |
|---|---|---|---|---|
| Antenna | 1 | $30 | Amazon | 5.8 dBi antenna. Any antenna with an N-Type male connector will work. |
| U.FL to N-Type Female | 1 | $9 | Amazon | Connects the MeshADV to the antenna. |
| ATGM336H GPS+BDS | 1 | $20 | Amazon | Optional, if you want to build an NTP server as well. |
| MeshAdv Pi Hat v1.1 | 1 | $? | Etsy | Currently sold out at the time of writing. PCB is available on GitHub to order through JLCPCB. |
| PiMesh-1W | 1 | $65-$105 | MeshSmith | Replacement to MeshADV. Made by a local CT Dev. |
| Raspberry Pi 4B – 2GB | 1 | $45 | PiShop | 2GB is more than enough for MeshCore and leaves resources for other services. |
| 32GB MicroSD Card | 1 | $14 | Amazon | Max Endurance MicroSD recommended for long runtime. |
| WaveShare PoE Hat | 1 | $25 | Amazon | Optional PoE hat with GPIO passthrough. Note: the fan on these models tends to fail — alternative hats recommended for long-term builds. |
| USB-C PoE Splitter | 1 | $15 | Amazon | Optional PoE splitter instead of a PoE hat. |
| Brass Spacer/Standoffs + Nuts + Screws | 1 | $10 | Amazon | Standoffs and spacers. |
| Outdoor-rated project box | 1 | N/A | N/A | A box large enough to fit the Pi and two GPIO hats installed. |
🛠️ Explanation
The main use case of this node is for building a static home base or remote deployment where you have internet access via Ethernet to the Pi. This allows you to update the node remotely without needing USB, Wi-Fi, or Bluetooth.
This document assumes the user has fundamental knowledge of using a Linux OS.
This document includes instructions for adding the GPS module, but does not provide guidance on building a stratum-1 NTP server.
⚡ Hardware Build Instructions
NOTE: NEVER POWER ON THE MESHADV WITHOUT AN ANTENNA CONNECTED!
Doing so can (and likely will) burn out the SX1262 radio.
We will be using the WaveShare PoE hat in this build. You can also use a USB-C PoE splitter instead.
-
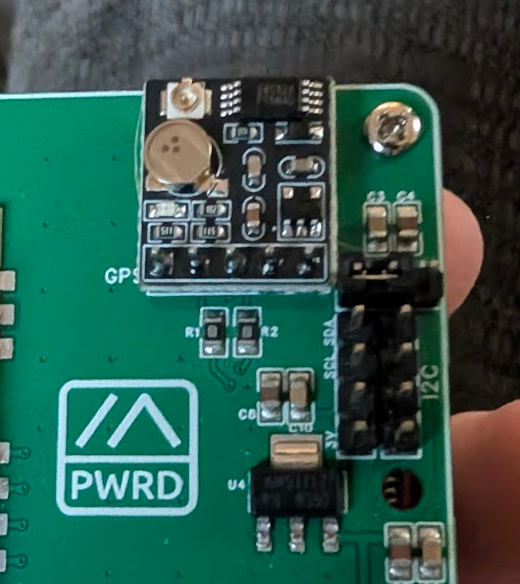
OPTIONAL: Solder the GPS module to the MeshADV board. The recommended module is the ATGM336H listed in the BOM.
-
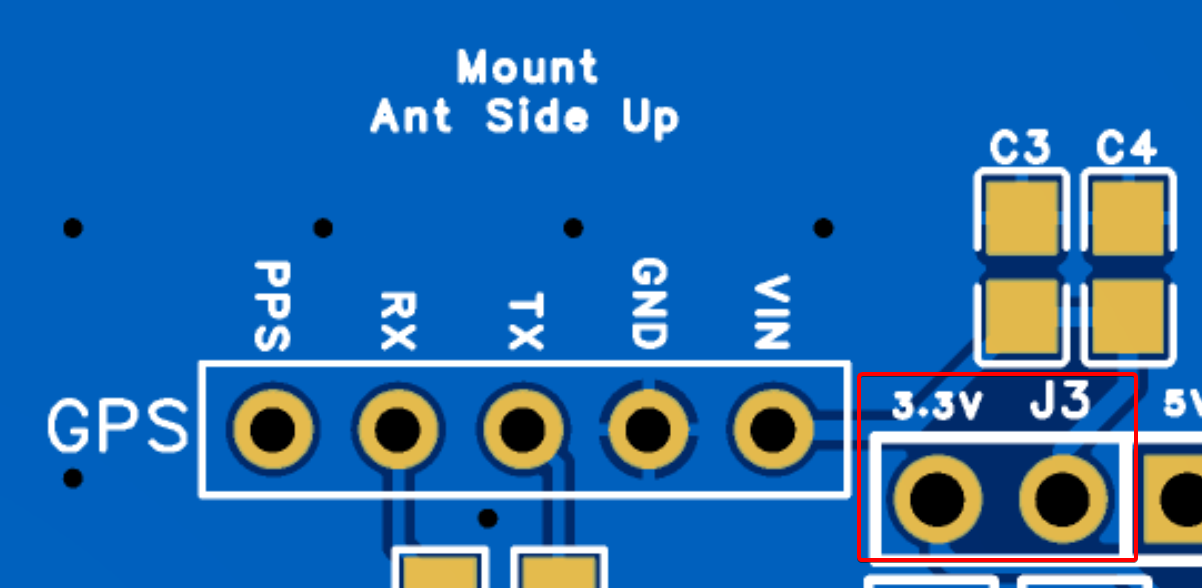
Once soldered, jumper the
3.3vandJ3pins on the board to power the GPS module.
-
Be careful that the GPS antenna does not short against the backup battery soldered onto the GPS module.

-
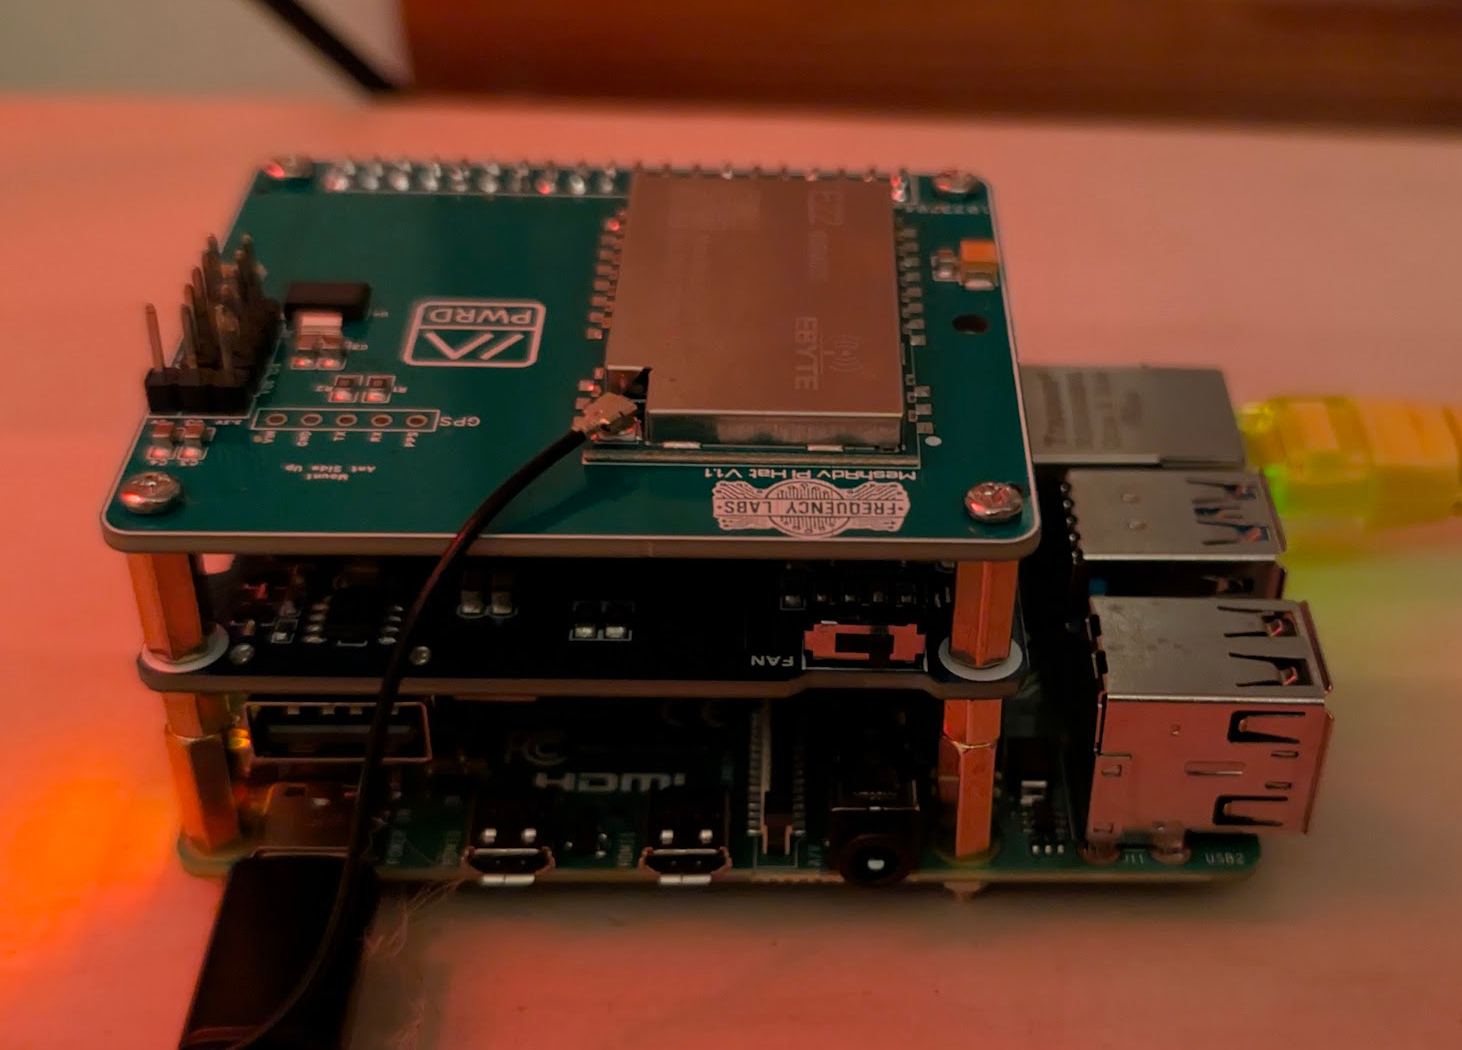
Install the PoE hat and MeshADV, starting with the PoE hat and then stacking the MeshADV on top.
-
Connect the desired antenna.
-
Power up the Pi by plugging in an Ethernet cable with PoE. You can use a PoE injector or a PoE-capable network switch.
🚀 Software Build Instructions
-
Image the MicroSD card using Raspberry Pi Imager with Raspberry Pi OS Lite (64-bit). Configure custom settings such as hostname, location, and user login. (Enable Wi-Fi if needed.)
-
Insert the MicroSD card into the Pi and power it up.
-
Once the Pi boots, locate it on your network and SSH into it using the credentials you set.
-
Update the Pi:
sudo apt update && sudo apt upgrade -y
- Install dependencies:
sudo apt install git bc -y
Next, we need to enable: SPI, I²C, and UART.
We need to edit the /boot/firmware/config.txt file:
sudo nano /boot/firmware/config.txt
Add the following to the bottom of the file:
# Enable SPI
dtparam=spi=on
dtoverlay=spi0-0cs # Do NOT include this for PiMesh-1W v2!

# Enable I2C
dtparam=i2c_arm=on

# Enable UART (For all Pi versions except Pi 5)
enable_uart=1
Note: If doing this on a Pi 5, use this entry for UART instead:
dtoverlay=uart0
Clone the pyMC_Repeater repository:
git clone https://github.com/rightup/pyMC_Repeater.git
Install the repeater software:
cd pyMC_Repeater && sudo bash manage.sh install
- The installer will install all required packages and dependencies for pyMC.
After the installation finishes, the script will prompt you to open a web browser and continue setup at:
http://<your-pis-ip-address>:8000
After completing setup, your dashboard should look similar to the example below.

⚙️ pyMC Repeater Configuration
To change the configuration of the repeater, edit the config.yaml file.
Using nano, edit the file located at:
sudo nano /etc/pymc_repeater/config.yaml
After making changes, restart the service. This can be done using the manage.sh script:
sudo bash manage.sh restart
Or via systemctl:
sudo systemctl restart pymc-repeater.service